

Finding the perfect recreational vehicle was just the beginning — outfitting your new RV can be the biggest challenge of all. Most RV campers assume the starter accessories included in a dealer’s package will be enough, but those “bundles” rarely include the essential items you’ll actually rely on during every RV trip. This article is about choosing and outfitting an RV for retirement adventures, is full of helpful information.
This article will not explore how to buy or choose an RV. The focus is on how best to use it, what you need to equip your RV so your trip is pleasurable. Outfitting an RV is like furnishing a real house. At the end of this article you will find our PDF about all of the things you need to acquire.
Your RV is your home away from home — your front seat to cross-country adventure and weekends at national parks or the great outdoors of North Carolina. Outfitting it properly ensures safety, comfort, and a better overall experience, whether you’re on your first camping trip or planning long drives for a longer period of time.
Please note that this article will discuss many products that will make RV life easier for you. To make it easier for you to actually see some of the items, we have inserted links to Amazon, Camping World, and a few other suppliers. If you are interested in knowing more about the item, such as a 50-amp power cable reel, click on the link and read about it.
Going to an informative source about an item, such as solar panels, will give you more in-depth information. The types of information will help you calculate how many panels of what wattage you may need. Unfortunately, we can not cram all of that knowledge into this article without it becoming a book.
Start With the Basics: RV Outfitting Essentials
Before you start decorating, focus on safety and maintenance — the important items your RV life truly depends on. Even the highest quality travel trailer or motorhome will fail you if your electrical systems or water systems aren’t supported by the right gear. The information below will help in choosing and outfitting an RV for retirement adventures.
Water Connection
Getting clean, consistent water is one of the most important items in any RV trip setup. Your water systems need to be safe, reliable, and easy to manage, especially on long trips or when you’re visiting national parks or older campgrounds that might have high water pressure or questionable quality.
You have choices about the quality of water on your trip. You can hook directly to the water bib at the campground, or you can use a water filter system to improve safety and taste.
The lowest-cost option is to buy a Camco filter that screws directly onto the water bib, then attach your water hoses to the other end. This means all the water from the bib—used for showers, cooking, and even flushing—goes through the filter. These filters are very basic, but they work for most RV campers on shorter stays.
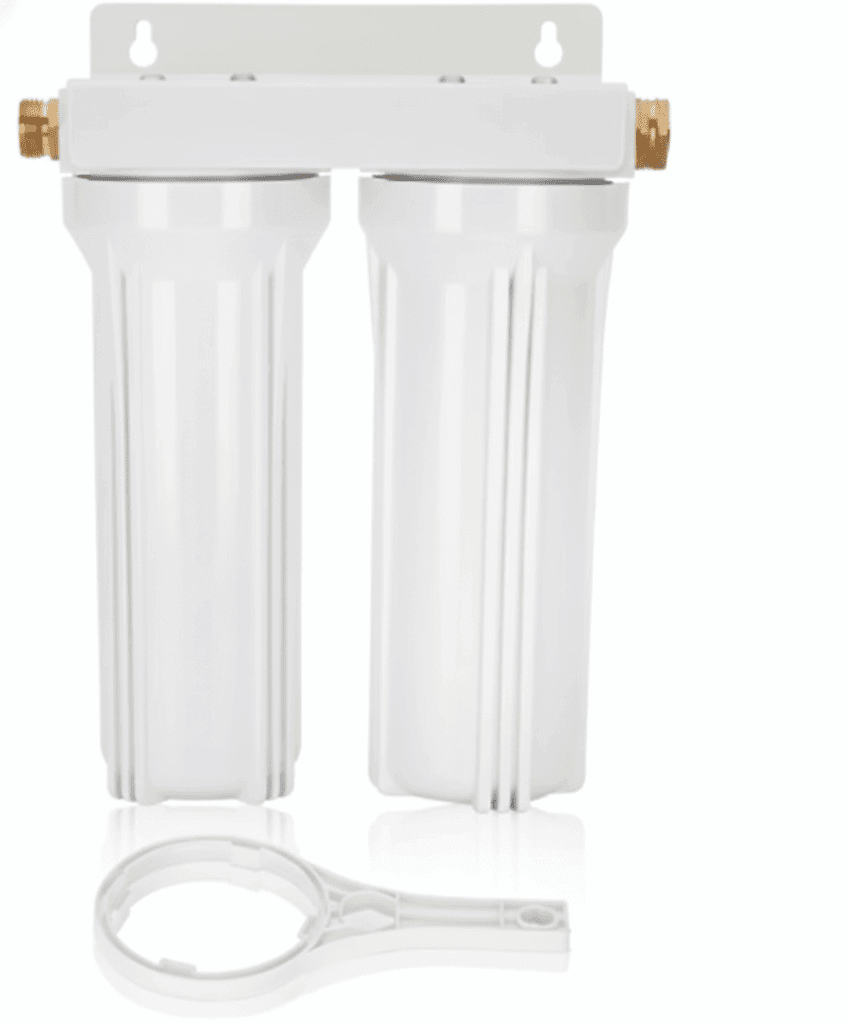
If you want better water quality, use a two- or three-stage filter unit. I bought a two-filter system that fits neatly inside my water cabinet. I mounted it on the wall using brass fittings to connect the inlet and outlet between my water hose and the RV inlet. Each canister unscrews easily, so I can replace filters as needed. The first stage filters sediment, the second filters pollutants, and a third stage (if you choose that model) removes the finest impurities for excellent water taste and clarity.
If you don’t have space in your cabinet, do what many full-timers do—set the unit on a small table outside your travel trailer near the water fill area and pack it away when you leave.

Choosing the Right Hose and Pressure Regulator
Choose a good hose made for fresh water (they’re usually white). Keep both ends clean and capped when not in use. I use a metal flex hose with a pliable center that stays permanently connected to my RV; I drop it through the opening in the cabinet and connect it to the campground bib when I arrive.
Now, about the water pressure regulator—it’s a small piece of gear that makes a significant difference in protecting your RV water systems. Your filter setup will naturally reduce some pressure as water flows through, but a regulator ensures you don’t blow out fittings or damage lines. You can install the regulator in several places: right at the bib, between the hose and the filter, or at the RV inlet.
If you attach it to the bib, remember to remove it before leaving; they’re easy to forget! Regulators come in two types: a simple brass one and one with a pressure gauge. The gauge isn’t strictly necessary, but it’s a good idea if you want to monitor and dial in the pressure for your specific setup. Campground water often runs at much pressure—sometimes over 100 psi—so this little part protects your investment and saves you an extra cost in repairs.
Sewer Gear
Every recreational vehicle needs a dependable sewer hose setup to handle waste safely and efficiently. This is one of the most essential items for maintaining hygiene and avoiding unpleasant surprises on your first camping trip or during long drives.
Here’s what to include in your RV essentials list for the black tank system:
- A heavy-duty sewer hose — don’t rely on thin starter hoses; invest in the highest quality you can afford.
- A clear elbow connector so you can see when the tank is finished draining.
- A hose support cradle or ramp to ensure steady, downhill flow.
- A dedicated “dirty” hose for rinsing the tank (never mix this with your fresh water setup).
- Disposable gloves and hand sanitizer for clean-up days.
- A black tank flush adapter or rinse cap to clean the hose and fittings.
- Hitch and coupler locks for security at your home base or campground.
- RV Toilet Treatment many types, from bottles, granules, to pods, which deodorize and break down waste in your black tank.
If your campground offers a sewer dump, connect carefully and double-check all fittings before opening the valves. Keep your sewer hose separate from other gear — ideally in its own storage bin or tube outside of your camper to maintain sanitation.
If you don’t want to manage the large sewer hose, you can still place supports or ramps to direct the flow neatly toward the drain. But there’s also another, cleaner way to handle the process — using a macerator pump.

Macerator Pumps: A Cleaner Alternative
For many RV campers, a portable macerator is a great addition that simplifies waste management and reduces mess. I use a macerator pump, which replaces the need for bulky hoses and fittings.
Here’s how it works:
- Twist the macerator directly onto your sewer outlet.
- Connect a garden hose (or, better yet, a ¾-inch hose for improved flow) to the outlet and run it to the sewer drain or cleanout.
- Attach the unit’s power lead to a 12-volt source inside your RV — or use a simple adapter to connect it to 120V.
- Open your tank valves and press the button to activate the pump. The device grinds up everything and pumps it smoothly up to 100 feet away.
- When finished, close the valves and run the pump briefly to clear residual waste.
- Disconnect the hose, then connect it to the water bib and flush the system for a few seconds.
The unit also includes a backflush connection, allowing you to clean the line with a second hose or your RV’s built-in backflush system.
One reason I prefer this setup is that it’s clean, compact, and simple — no heavy or messy hose to store. When I take my RV home, my cleanout is about 40 feet away, and the macerator easily pumps the waste that distance without hassle.
There are several brands of macerators on the market, many come with accessories, eliminate them and supply your own for a lower price. If you frequently dump at home or just want a less stressful sewer process, a macerator is one of the smartest RV accessories you can buy.
Other sewer stuff
Be sure to have sufficient toilet or black tank deodorizer/treatment products on hand. Walmart sells them in all of its larger stores. Choosing and outfitting an RV for retirement adventures should include a good look at these choices. These products come in pods, liquid and granules. Most have bacteria that is designed to digest the contents of your tank including break down materials e.g. toilet paper.
Speaking of toilet paper, buy toilet paper made for RV’s. Yes it’s thinner and often single ply but it is designed to disintegrate faster. Any RV supply store will have it include the RV section of Walmart and of course on line. Amazon has a large case with 24 rolls at an excellent price. Stock up if you are going boon docking.
Shore Power, Power Cords, and Adapters
Shore power is simply the act of plugging your RV into an electrical outlet at an RV park, campground, or even at home. It’s the most common way to power your recreational vehicle when stationary.
Larger RVs and 5th wheels typically use a 50-amp 110-volt cable — a heavy-duty cord that can be difficult to manage, especially in cold weather when the insulation becomes stiff. These cables can contain 6 AWG copper wire or 4 AWG aluminum wire, making them quite heavy. A smart solution is to buy a cable carrier, a simple wrap-around Velcro strap with a handle that makes the cord much easier to lift, coil, and transport.
It’s best to also purchase a surge protector, which not only guards against voltage spikes but also protects from low voltage — one of the biggest threats to electrical systems in older parks. Plug the surge protector directly into the campground pedestal, then connect your RV’s power cord to it. At around $70, a good surge protector is one of the most important items you’ll ever buy; it can prevent damage to your air conditioners, appliances, and the RV’s internal wiring.
Smaller travel trailers often use a 30-amp 110-volt cable instead. These cords are lighter and easier to handle, and they’ll power one air conditioner and basic appliances. Larger 50-amp systems can power two or even three air conditioners, microwaves, and other energy-hungry components.
Use an extension cord
If you ever find that your RV can’t quite reach the pedestal, buy a 25-foot extension cord rated for your amperage. Most factory cords are about 50 feet long, and the extension provides just enough extra reach for awkward campsite layouts without compromising voltage.
On occasion, I’ve camped in 40-degree weather, and the RV power cable becomes extremely stiff and difficult to coil. It’s best to put on gloves, since the cable often lies on gravel or damp ground. Bring your cable wrap right to where you’ll be coiling, and in cold weather, make larger loops — forcing tight coils can crack insulation over time. A little patience here will save you from fighting a frozen cable later.
Even better, obtain and install a cable reel. This reel from MORyde will cost about $170, but it is worth it. Mount it in your storage compartment. Place one end in and crank it until the entire cable is wound. No lifting or hassle. If you have the money, buy a power unit, just push a button, and it will reel in the cable.
I read a comment where one buyer mentioned that handling the 50-amp cable in winter is like wrestling an anaconda.
Lastly, keep a few dog-bone adapters on hand so you can connect your rig to various power sources — like a 50-amp plug into a 30-amp outlet or a 30-amp plug into a standard 15-amp home circuit. Always make sure your adapters and cords are in good condition, and never exceed your rated load.
Batteries
Most RVs come equipped with one or two batteries, but a few larger recreational vehicles include a full battery bank made up of several 6-volt or 12-volt units wired together. It’s worth noting that many RV dealers consider batteries an add-on, not part of the base package.
You can sometimes negotiate with them for an included setup, but honestly, it’s better to spend the money and upgrade to lithium-iron batteries from the start. Most dealers will not “give” you these batteries as part of the deal because they cost much more than lead acid batteries. Just take what they give you and order the batteries from Amazon. Replacement is simple.
Why Lithium Is the Better Choice
Traditional lead-acid or “deep-cycle” batteries have a limited number of discharge and recharge cycles. Each time they’re drained and recharged, they lose a bit of capacity. Even high-end deep-cycle models gradually weaken over time and require regular maintenance: topping off water levels, venting, and cleaning corrosion.

Lithium-iron phosphate (LiFePO₄) batteries, by contrast, offer thousands of charge cycles, deliver consistent voltage, and require almost no maintenance. They don’t emit acid mist, so there’s no corrosion or need for venting. And if you plan to install solar panels, lithium is the only smart choice — these batteries can absorb and store solar power efficiently, making them perfect for boondocking or extended off-grid stays.
My Experience With the Upgrade
I replaced my two Group 24, 100-amp-hour lead-acid batteries with two 300-amp-hour lithium batteries, and the difference was dramatic. These stronger batteries easily power my 12-volt refrigerator, dehumidifier, alarm system, and every other 12-volt device in the RV with no effort. My truck charges them while driving, and they also receive steady input from my solar panels during the day.
Although I haven’t done extensive boondocking yet, I could comfortably camp for several days without plugging into shore power. The lithium batteries maintain voltage throughout the discharge cycle — no dimming lights or sluggish pumps as capacity drops. When I upgraded, I also replaced my solar controller to match the lithium chemistry (more on that in the solar section).
If you’re serious about RV life, investing in lithium batteries may be one of the best decisions you’ll make. The initial cost is higher, but their performance, longevity, and reliability pay off over years of RV travel. You may need to upgrade your charge controller if you have solar panels.
Generators
Most motorhomes come equipped with built-in generators, typically fueled by either gasoline or propane. These factory-installed systems are convenient, reliable, and can be started from inside the coach. For many RV campers, they’re the primary power source when shore power isn’t available.
There aren’t many “upgrades” available for built-in generators — but for those who own 5th wheels or travel trailers that don’t come with one, there are excellent portable options. Some newer units are prewired for generator installation, often in a front storage compartment.
If your RV has this setup, you can install an Onan RV generator that runs on propane. These systems integrate neatly with your rig’s wiring and controls.
My Portable Generator Setup
My 5th wheel didn’t come with a prewire, but I found a solution that works beautifully. Instead of mounting the generator inside the large front compartment, I placed it in the bed of my truck. This keeps exhaust fumes completely outside the RV, which is safer and quieter.
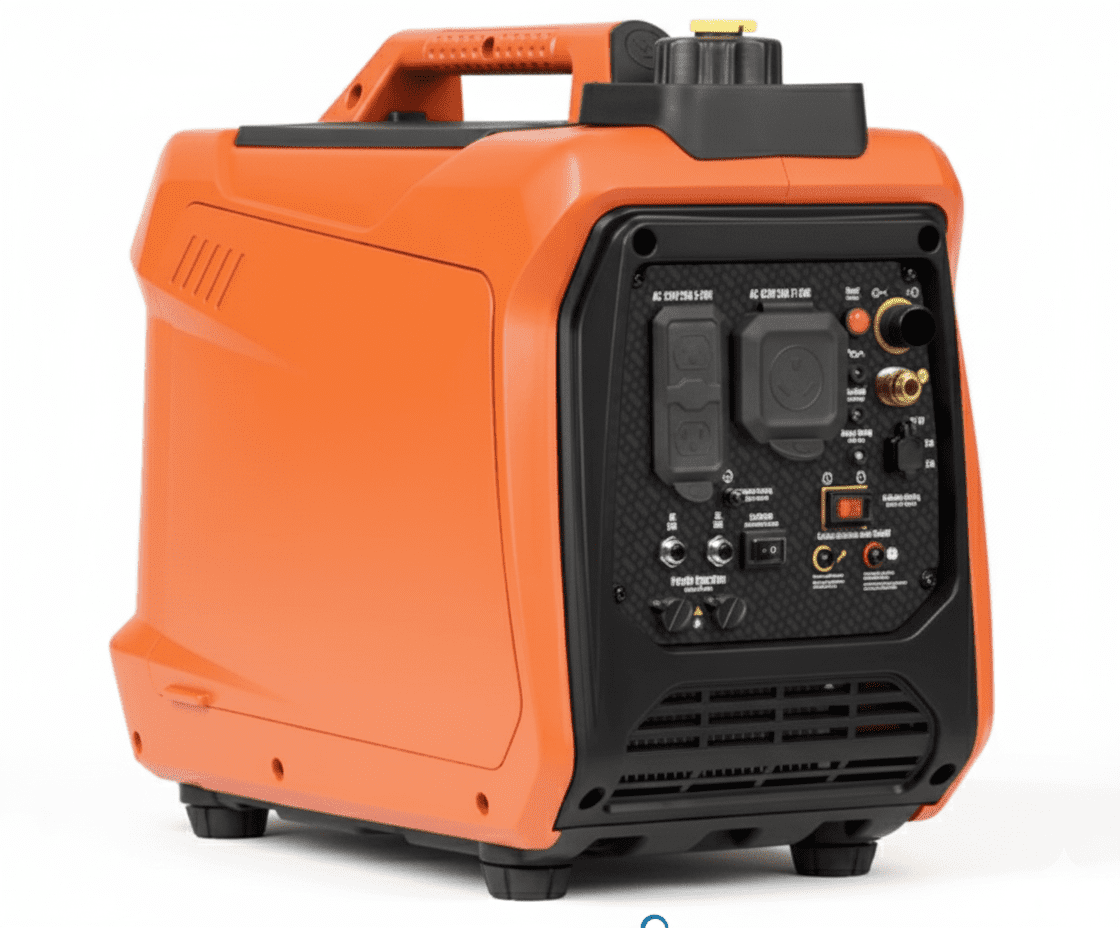
One challenge that many older RVers face is weight — medium-sized portable generators typically weigh around 100 pounds, making them hard to lift and maneuver. I discovered a remote-start generator that weighs just 43 pounds and produces over 30 amps. It’s a dual-fuel model, capable of running on gasoline or propane, which gives me flexibility depending on where I’m camping.
To simplify the setup, I bought a long propane hose and regulator to connect the generator to my existing BBQ connection on the front of my RV. Since my shore power plug is located at the rear of my long unit, I also purchased a 50-foot 30-amp power cable, which is light and easy to handle. This setup allows me to run one air conditioner and my smaller appliances with no problem.
My refrigerator runs on 12 volts, and my batteries charge automatically while the generator powers the air conditioning. For added flexibility, I bought a second, smaller generator of the same brand and placed it on the opposite side of my truck bed. By linking the two generators together, I can achieve 50 amps of output, which is enough to run both air conditioners simultaneously.
I typically only bring both generators when traveling in the western states, where rest stops and remote campsites often lack hookups. This setup lets me fire up the A/Cs, stay cool, and recharge batteries comfortably wherever I park.
Solar Power Systems
Solar power is a hot topic — not just for RVs, but for homes as well. I even wrote an extensive article about solar power for seniors, explaining that for many homeowners, there’s often little or no financial payback for installing panels.
That’s not the case with recreational vehicles. In fact, I think solar truly shines here (pun intended).
When you’re parked without shore power or storing your RV for long periods, solar keeps your batteries, security systems, and other essentials running quietly and reliably — no fuel, no noise, and minimal maintenance.
Sorting Out the Confusion
There’s a lot of mystery surrounding solar setups:
How many panels do you need? How many watts? How does that translate to amps and volts?
The research can quickly send you in circles, so let me share what I did.
My last two motorhomes each came with one 100-watt solar panel, which is fine for keeping batteries topped off during storage. But 100 watts isn’t enough for much else. I wanted to run an alarm system and a small dehumidifier while my RV was stored in a secure lot — a necessity since the area has high humidity.
The lot has no power outlets, so the system had to run completely on solar and battery power.
How I Upgraded My Solar Setup
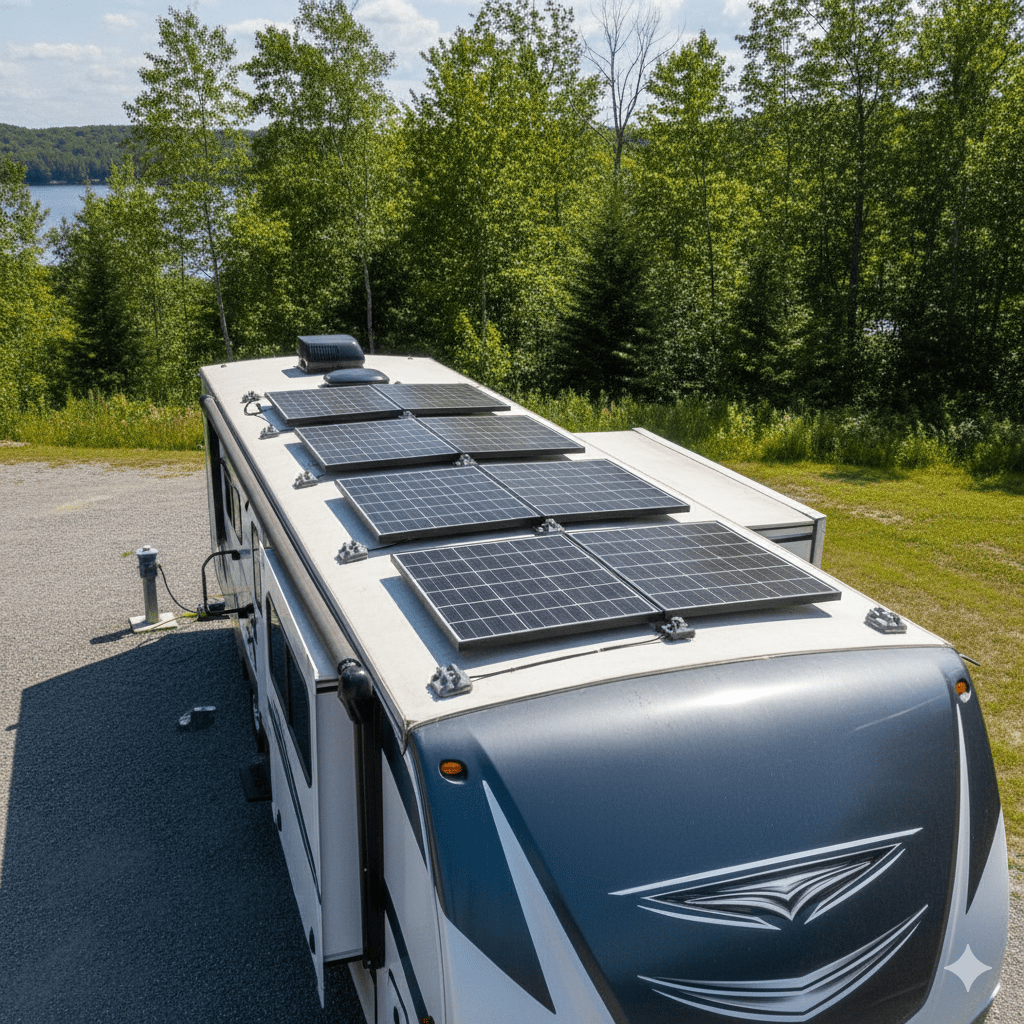
After researching my power needs, I determined I’d need about 300 watts of solar to comfortably handle my load. I found a 200-watt flexible solar panel — as thin as a few credit cards — and glued it to the roof, wiring it in parallel with my existing 100-watt panel.
That flexible panel worked beautifully and required no drilling. You can find the exact model I used here:
👉 Renogy 200W 12V Flexible Solar Panel on Amazon. I also upgraded my solar controller to handle the larger batteries. The new controller had a switch for lithium batteries. Your existing one may be ok if you have solar panels, but check to be sure.
Initially, the setup worked well, but over time, the constant cycling was too much for my lead-acid batteries. They simply couldn’t store enough energy overnight to keep the alarm and dehumidifier running without draining too deeply.
That’s when I upgraded to the lithium batteries I mentioned earlier — and it was a perfect match.
Solar and Lithium: A Perfect Pair
Lithium batteries thrive on solar charging. Once I installed the new batteries, I also replaced my solar controller with a higher-capacity model featuring Bluetooth monitoring. My batteries themselves also have built-in Bluetooth, so now I can track performance, charging rate, and voltage right from my phone.
After connecting everything, the system worked flawlessly. The lead-acid batteries would run down overnight, but the new lithium setup holds steady — powering my 12-volt refrigerator, alarm, camera and dehumidifier continuously. During daylight, the solar panels fully recharge the batteries while still running the equipment.
Know the Limits of Solar
If you’ve ever considered running your air conditioner on solar, my advice is: don’t — unless you’re a dedicated boondocker willing to invest in an array of extra panels and batteries. Even then, it’s a stretch. Air conditioners and residential refrigerators draw huge amounts of power, and unless you have a massive setup, you’ll deplete your storage quickly.
My goal was simpler — keep my refrigerator running while in transit, and maintain my alarm system, dehumidifier, and battery charge while in storage. For that, my 300-watt solar setup works perfectly.
I could add a few more panels if I wanted, but I don’t need them. The flexible panel is durable, lightweight, and weather-resistant — no glass to break, no rigid mounts to maintain. Best of all, it’s a plug-and-play system.
If you’re younger or comfortable with DIY projects, installing one or more flexible panels is easy. You can do it without drilling holes, just using quality adhesive or mounting tape.
Bottom line: Solar for RVs is one of the smartest, simplest upgrades you can make. It protects your investment, keeps your rig ready, and gives you quiet independence wherever your next adventure takes you.
12-Volt Power, Inverters, and Portable Power Stations
Every RV operates on two electrical systems: 12-volt DC and 120-volt AC (or 220 volts in some countries). A few high-end motorhomes use 24-volt systems, but those are rare in the United States.
The two systems interact through a device called an inverter, which is installed in some — but not all — RVs. Generators also have built-in inverter functionality, since they convert DC power to AC. You need 120-volt AC to run household-style appliances such as TVs, refrigerators, air conditioners, and microwaves. Meanwhile, the 12-volt system powers your interior lights, slide motors, water pump, heater fan, and other small devices in your rig.
Understanding 12-Volt Power and Its Limitations
What I’ve found over the years is that only the newest RVs come with 12-volt receptacles or USB outlets. Most rigs — even fairly recent ones — rely entirely on the 120-volt side, which can be inconvenient if you want to charge your phone or use a small 12-volt appliance without an adapter.
To fix that, I converted part of my system. I rewired a few light switch panels and replaced them with combination switch-and-12V-outlet units, similar to a cigarette-lighter plug. You can also pull a wire from an existing circuit and create a direct USB outlet — the parts are readily available on Amazon.
Most small appliances actually run on 12 volts internally, even if they plug into 120 volts. You can check this by reading the output on the “brick” (the power supply block) between the cord and the device. If it says something like “Output: 12V DC, 2A,” that means you can wire it directly to your RV’s 12-volt system — or use a converter if you need to raise or lower the voltage slightly.
Converting a Dehumidifier to 12 Volts
A great example of this is my dehumidifier, which I modified to run on 12 volts so it can operate even when I’m not on shore power. Here’s the one I used:
👉 Pro Breeze Electric Dehumidifier – Portable and Compact
I bought a cord with a standard barrel plug for the device (bare ends on the other side), and a cigarette-lighter plug, also with bare ends. I wired the two together and installed a 12-volt receptacle inside my RV. Now I can plug it in just like any other appliance.
To automate it, I also wired in a 12-volt timer that allows me to schedule on/off cycles — saving battery power and reducing humidity while my RV is in storage. This small project worked perfectly and has been one of the most satisfying upgrades I’ve done.
Inverters: Converting 12 Volts to 120 Volts
An inverter converts 12-volt battery power to 120-volt AC power. If you’re camping off-grid, it allows you to run regular household electronics — such as laptops, fans, or televisions — without a generator.
There are two main types:
- Pure sine-wave inverters are safe for sensitive electronics like computers and TVs.
- Modified sine-wave inverters are cheaper but may cause noise or heat in appliances.
I recommend pure sine-wave units for reliability. Always turn the inverter off when not in use, as it draws a small amount of power even when idle. Keep in mind that even when no power is required by the investor, it uses power when its turned on.
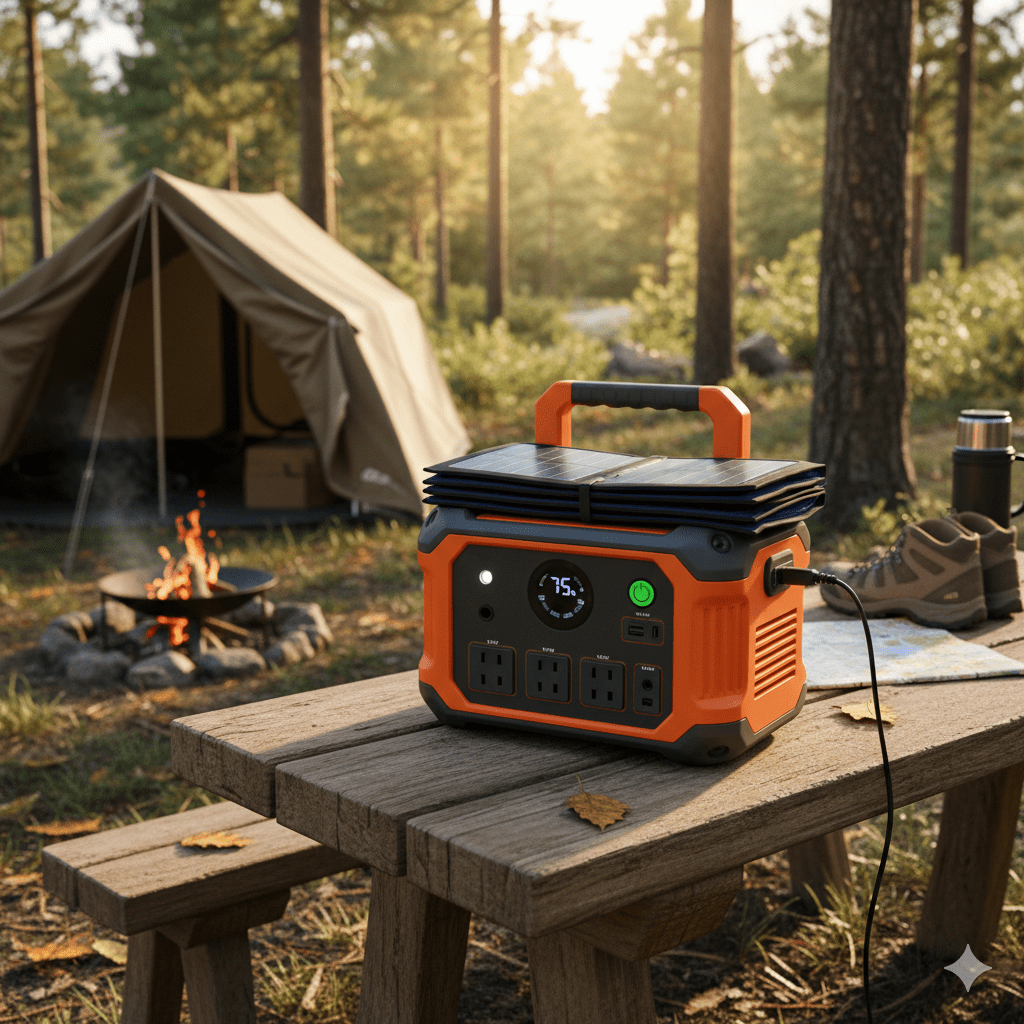
Portable Power Stations (a.k.a. “Solar Generators”)
Portable power stations have become incredibly popular among RV campers, van dwellers, and boondockers. These small units combine a lithium battery, an inverter, and multiple outlets in one box. Although often called solar generators, they don’t actually generate power — they store it.
They can be recharged from:
- Shore power (standard wall outlet)
- Vehicle 12V outlets while driving
- Solar panels using the built-in solar input port
These units are ideal for powering small 120-volt appliances for a few hours, or for short rest stops where you don’t want to fire up the generator.
Dump the inverter; these power stations are pure sine wave inverters and are portable. Buying and installing an inverter to provide 110V power from batteries is far more costly than buying one of the many solar generators on the market.
How I Use Mine
When my wife and I stop for a few hours on the road, we often relax in our 5th wheel and watch TV. Instead of running the main generator, we simply plug the TV into our portable power station. It quietly converts battery power into 120 volts — enough for a few hours of comfortable downtime.
These power stations are excellent for charging phones, laptops, cameras, or running fans and lights without draining your main battery bank. If you add a solar panel, you can recharge the station during the day and use it at night — an efficient way to stay comfortable without running a noisy generator.
Bottom line:
Understanding how your 12-volt system, inverter, and portable power stations work together gives you far more independence on the road. Whether you’re boondocking, pausing for a break, or just need quiet, reliable power, these systems let you stay flexible, safe, and comfortable anywhere you travel.
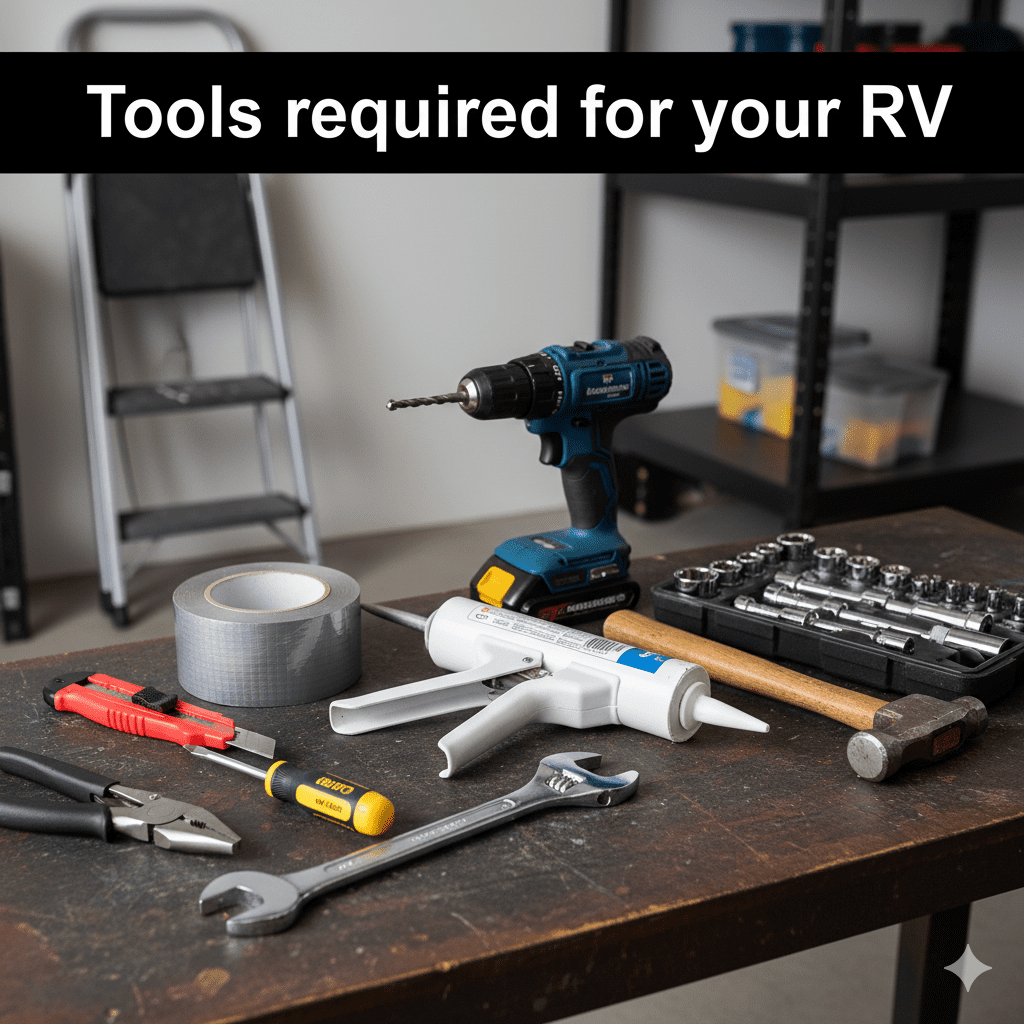
Tools and Safety Equipment
Even with a brand-new RV, breakdowns happen. Pack a dependable tool kit with:
- Pliers, screwdrivers, and a caulking gun for quick fixes
- A fire extinguisher rated for electrical and grease fires
- A ladder and a utility knife
- Roof repair tape for leaks after a low-clearance encounter
- A cordless drill to raise stabilizers faster
- A small shovel and basic spares for tire pressure checks
You’ll also want wheel chocks, leveling blocks, and a small bubble level to keep your rig steady. Don’t overlook hitch and coupler locks — they protect your recreational vehicle from theft when you’re hiking outside of your camper.
Security for your RV
Install a security system for your RV. You can use one of the off-the-shelf household systems for your RV. Our complete article about securing your RV is a must read here. The article will take you through the steps the author used to secure motor homes and 5th wheels.
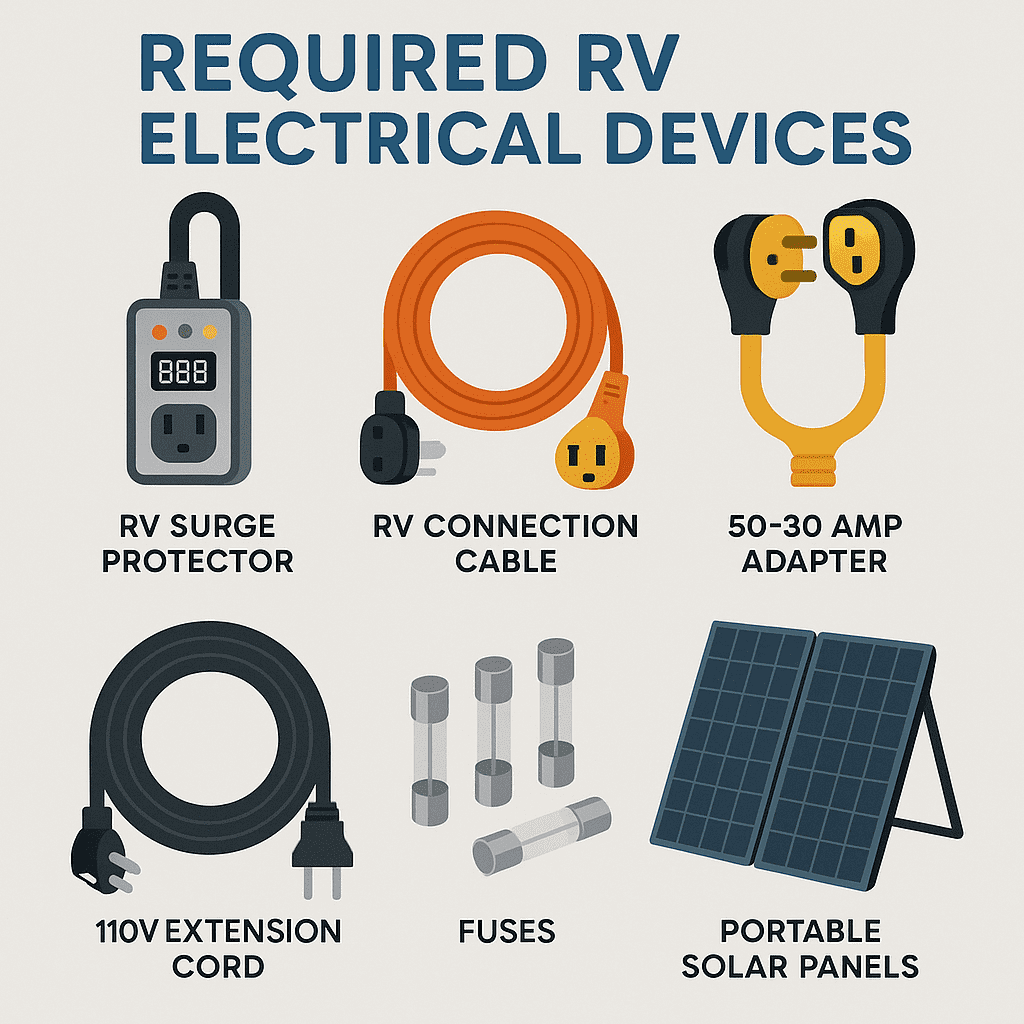
Power Sources and Electrical Gear
RV electrical systems are sensitive. Protect them before your first trip:
- A heavy-duty surge protector and power cord (30- or 50-amp, depending on your rig)
- An extension cord for distant hookups
- Plug adapters for different power sources
- Portable solar panels or a solar generator for off-grid travel
- A generator for running air conditioners during long trips or hot weather (generates 30 amps)
Using quality components isn’t an additional cost — it’s protection from fried circuits, ruined appliances, and failed power sources.
Protection and Exterior Maintenance
There are many things you can do to help protect your RV from the sun, weather, and theft. The exterior components of your rig take the most abuse — UV rays, rain, and road debris can all shorten its lifespan. A few inexpensive accessories and smart upgrades can protect your investment and make travel safer and more comfortable, especially for seniors or long-term RV campers.

Hitch Pin Locks: Protect Your 5th Wheel
If you own a 5th wheel, one of the first things to buy is a hitch pin lock. This device prevents anyone from backing under your kingpin and towing your trailer away.
A typical lock is a C-shaped metal collar that slides around the pin. It has holes on both sides where you insert a steel locking pin and secure it with a keyed lock. Once in place, no one can hook up to your unit without the key. It’s a simple, inexpensive investment that provides peace of mind when your trailer is parked unattended.
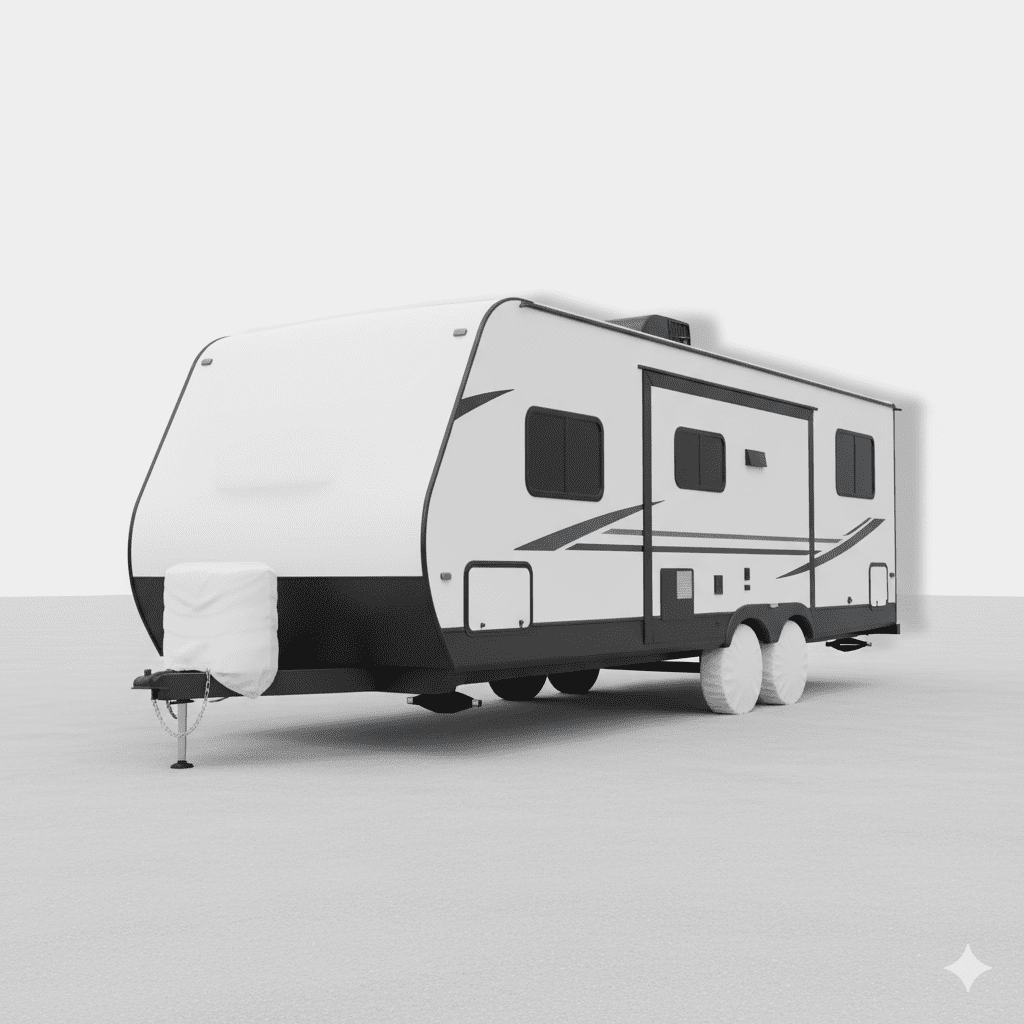
Wheel Covers: Protect Against Sun Damage
Your tires are one of your most expensive maintenance items — and the easiest to protect. Constant sunlight causes dry rot and cracking, even if the RV isn’t moving.
Wheel covers block UV rays and heat, keeping rubber pliable and extending tire life. Install covers on all tires facing the sun whenever your RV is parked for more than a day or two. They’re available in multiple sizes and materials, and they’re one of the simplest ways to save hundreds of dollars over time.
Safer Entry: Upgraded Grab Handles and Stair Rails
I’ve discovered that trailers and 5th wheels with fold-down stairs can be difficult for seniors to navigate. After researching solutions, I replaced the standard exterior handle on my RV with a longer, deeper grab handle. This larger handle makes it easier to grasp when entering or exiting the rig — a small upgrade that makes a big difference in daily use.
In addition, I installed a grab rail at the bottom of the steps. It bolts directly to the stair frame, creating handholds on both sides of the stairs for better balance and safety. This dual-rail setup works well for both motorhomes and travel trailers, especially for those with limited mobility or balance concerns.
Full RV Covers: Protection from Sun and Weather
If your RV is parked outside all the time, consider investing in a full RV cover. These covers protect your paint, seals, and roof from harsh sunlight, tree sap, and rain.
They’re excellent for long-term storage, but they do take a bit of practice to install. Usually, it’s a two-person job to get the cover over the top of the RV without tearing or dragging. The trick is to pull it evenly across the roof, then work it down the sides.
I recommend using a full cover only when you plan to store your RV for an extended period. Installing and removing it after every weekend trip will wear you out quickly and increase the chance of damage.
Carrying Bikes and Gear
One common challenge is how to carry e-bikes, bicycles, or other heavy equipment on the back of your RV.
Yes, there are bike racks designed to fit the square receiver hitch on the rear of motorhomes, 5th wheels, and some travel trailers. However, lifting heavy e-bikes high enough to secure them can be difficult and often requires two people.
My solution was to purchase a cargo basket carrier with a ramp. Mine is aluminum, lightweight, and folds up at the end once the bikes are loaded. Because my bikes are folding models, I simply fold them and tie them down securely on the basket.
When you choose tie-downs, always use ratchet fasteners instead of slip-in pins, which can work loose during travel.
Preventing Bounce and Securing the Cargo Basket
A common issue with rear cargo baskets is bounce — especially when carrying heavy loads like e-bikes or portable generators.
Most carriers are rated between 300 and 500 pounds, but that doesn’t mean the hitch receiver on your RV can handle the same load. Always check that your receiver rating matches or exceeds your basket’s capacity. Never attach a basket directly to the rear bumper — those thin, welded tubes aren’t designed for weight and can bend or break.
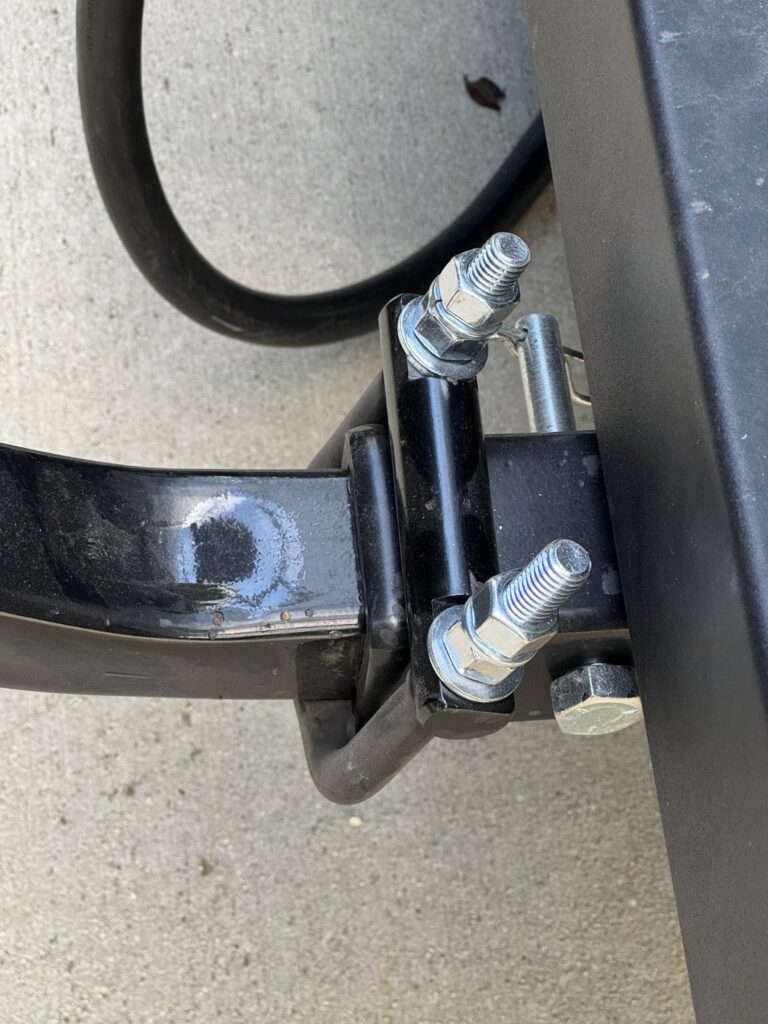
To eliminate bounce and sway:
- Use an anti-rattle hitch clamp. This tightens the connection between the basket’s tongue and the receiver, removing the small amount of play that causes wobble.
- Replace the folding pin with a brass bolt. If your carrier folds up when empty, buy a brass bolt (same size as the pin), a washer, and a nut. Insert it through the hole when lowering the carrier and tighten it to eliminate movement.
- Add ratchet straps on both ends. Attach straps from the basket to the RV’s frame on either side. This prevents the platform from bouncing on rough roads.
- Optional upgrade: Have a welder add side brackets to the frame so your carrier attaches at three points instead of one. This greatly increases stability for heavier loads.
I also occasionally carry a generator on my cargo basket. It’s secure, well-balanced, and doesn’t transfer vibration into the RV. Just be sure to keep fuel containers upright and sealed, and double-check your ratchet fasteners before every trip.
Bottom line: Protecting your RV isn’t just about aesthetics — it’s about safety, longevity, and peace of mind. From locking your hitch to stabilizing your carrier, these small investments go a long way toward preserving your RV and making travel safer and more enjoyable.
What’s Your RV Style? Decorating Your Rig
Once the RV essentials are covered, you can turn your attention to comfort. Whether your rig is a travel trailer, fifth wheel, or motorhome, the storage space is limited, so choose décor that saves room while adding personality.
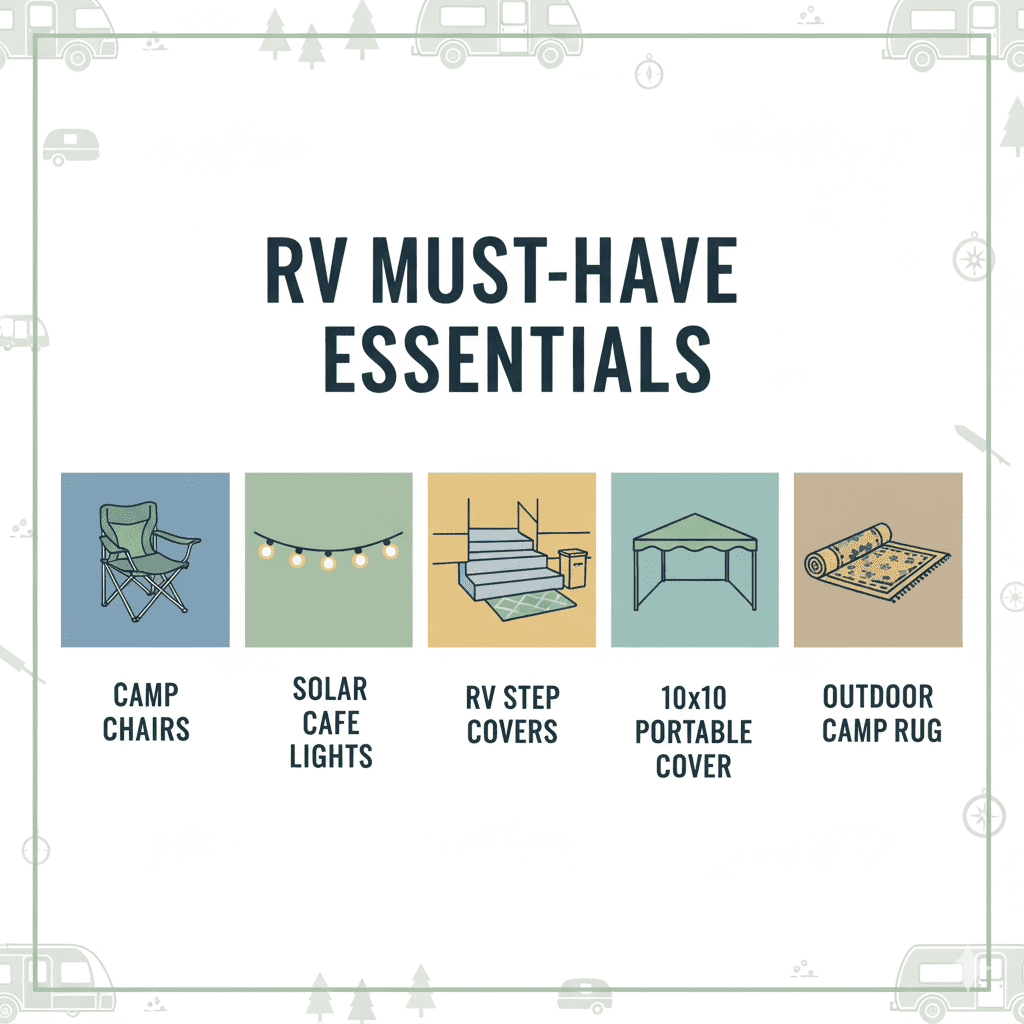
Outdoor Living Space
If you stay a while at campgrounds or RV resorts, create a comfortable home base.
- Lightweight camp chairs and folding tables
- Solar or string café lights
- Weather-resistant rugs and pillows
- Dog beds and outdoor adventures décor
- Step covers and colorful RV signs
- Colapsable latter
- 10×10 pop up canopy
These simple touches make a significant difference in comfort and atmosphere.
Outdoor Grilling
Consider using propane rather than charcoal. Some RVs have an outside snap-on outlet for a BBQ hose. This makes a quick and clean connection. You can use the propane in your rig to power your BBQ. If you do not have a quick connect outside of your RV, you can install one.
There are many types of RV grills and BBQs available. Camping World has a good selection. I have a small stainless steel model that slips into my RV storage compartment. Don’t forget your utensils for cooking and cleaning your grill.
Interior Upgrades
Enhancing your RV kitchen and living areas can transform RV travel:
- Peel-and-stick tiles and wallpaper for easy style
- New cabinet knobs and pulls
- Stove-cover cutting board to create counter space and help you store food
- Bedside caddies and floating shelves (save space and hold personal items)
- Magnetic knife racks and spice organizers — smart kitchen supplies that look good and keep things in place during long drives
These optional items may not be critical, but they make a great addition for daily comfort and organization in rigs with less space.
Where to Shop for RV Accessories
Outfitting an RV takes time — and you’ll probably refine your setup over multiple trips.
- Camping World is the go-to for RV accessories, water systems, and electrical gear.
- Amazon carries nearly everything, from smaller hoses to décor.
- Wayfair offers fun, space-saving décor for tiny interiors.
- Walmart has an RV department in all of its stores, plus online.
- Etrailer offers many of the items listed above, particularly for trailers
Always prioritize essential items like hoses, regulators, surge protectors, and sewer kits before spending on décor. Bring a list to your grocery store run or local RV shop — having the right gear saves much time and stress on the road.
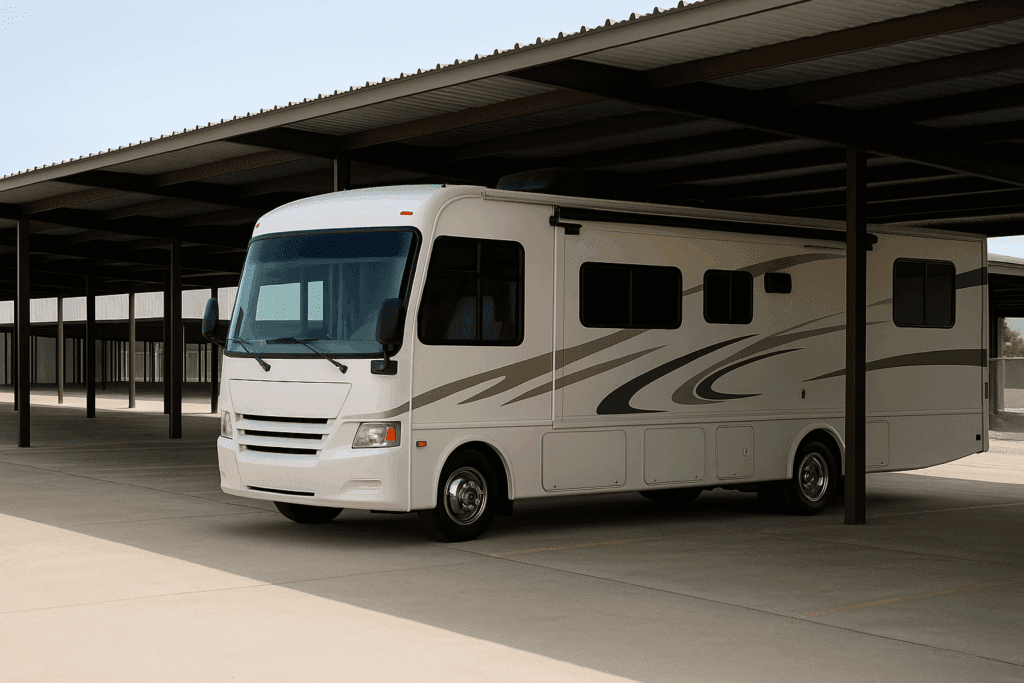
Secure and Store Your RV Properly
When it’s time to park your RV for an extended period, proper storage makes a significant difference in protecting your investment. Exposure to sun, rain, humidity, and theft can cause long-term damage if not addressed.
Consider storing your RV at home if local ordinances or HOA rules allow it. Home storage is typically the safest option, letting you check your recreational vehicle regularly, maintain the batteries, and monitor for leaks or pests.
If home storage isn’t possible, select a professional RV storage facility carefully:
- Choose a covered space whenever possible — it protects paint, roof seals, and tires from UV damage.
- For motorhomes, make sure the facility has not had a history of catalytic converter thefts.
- Ask the storage manager about on-site services such as propane refills, dump stations, and battery charging.
- Discuss access hours, security systems, and fencing before committing.
- If you store your RV long-term, insurance companies may require that the site have video surveillance, alarm systems, controlled gate access, or even 24-hour monitored security.
- If you’re permitted and have space, consider building your own sun covering or carport — a few poles and a durable awning fabric can dramatically reduce exposure and extend the life of your RV’s finish.
Whether you store your RV at home or off-site, make sure it’s secured, covered, and easily accessible when you’re ready for your next RV adventure.
It’s the perfect way to protect your rig’s roof, paint, and gear — so it’s ready for your next trip.
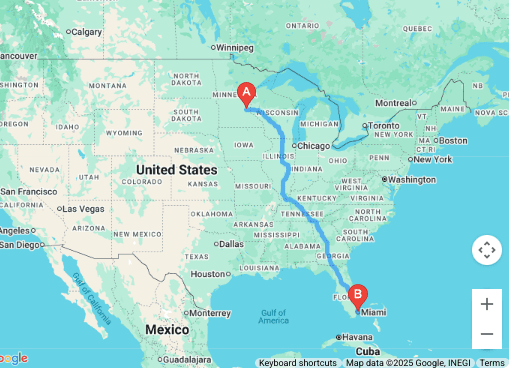
Where are you going?
You have probably used Apple or Google Maps and routing to locate your campground and it works for that. I was on a cross country trip from the Gulf Coast to California. We decided to stop about every four hours and spend the night, taking time to look around and enjoy the area, have dinner out and watch some TV before bed.
Our four hour days were eight hour days due to stops, construction, fuel and just stretching our legs. When we needed to get fuel or use the “facilities”, we were at the mercy of roadway signs to tell us where we could stop. Not ideal but it worked. Backing up, it took quite a bit of work to find places to stay, I will get to that.
We were routed to a street that took us under a very low bridge that did some damage to the AC units on our 5th wheel. This is a story for another time. In the end, I wished I had an app that would do the following for me:
- Route me from start to final destination
- Include rest stops
- List fuel stops
- Low bridges, route around road construction
- Offer search of campgrounds
- Most important, use a time or mileage based estimate of the best place to stop e.g. 4 hours
I found exactly what I was looking for in an app called “RV Life”. It has all of the above and more for an annual subscription fee. Check back, I will be adding a link.
Final Thoughts: Outfitting for the Great Outdoors
Outfitting your RV is a journey, not a single shopping trip. Start with the first things, like safety gear and water systems, then personalize it over time. Every upgrade — from solar panels to camp chairs — enhances your overall experience and makes your rig a true home base for the great outdoors.
Use our downloadable PDF checklist to be sure you have everything you need.
So grab your checklist, stock up on essential items, and head out prepared. Whether you’re in North Carolina or Alaska, the right setup turns every RV trip into a comfortable, confident RV life adventure.
Note: RetireCoast may be compensated by one or more vendors listed above. The intent is to provide you with a link to a real product for the category discussed. You can uses the link to read more about it and possibly buy it. Some of the items listed I have purchased, others are representative of products that I have purchased. As always buyer beware, make your own choice after completing research.
FAQ: How to Choose and Outfit an RV for Your Retirement Adventures
1. What type of RV is best for retirees?
The “best” RV depends on your mobility, budget, and travel style. Many retirees prefer Class C motorhomes and mid-size fifth wheels because they offer residential comfort, good storage, and easier driving/parking than large Class A rigs. If you want lower cost and already own a capable tow vehicle, a travel trailer can be a great option.
2. How big should my RV be for long trips or full-time RV life?
For long trips, 25–35 feet is a common sweet spot: big enough for a comfortable bed, usable bathroom, and real seating area, but still maneuverable in national parks and older campgrounds. Go larger only if you’re comfortable driving/towing a big rig and don’t mind limitations in older or tighter campgrounds.
3. What are the most important safety items I should buy first?
Top priorities include: a quality surge protector, wheel chocks or wheel clamps, a tire pressure gauge and inflator, proper sewer hose and gloves, an RV-rated fire extinguisher, reflective warning triangles, and upgraded grab handles or stair rails if you have any balance or mobility concerns.
4. Do I really need a water pressure regulator and water filters?
Yes. Campground water pressure can be much higher than your RV’s plumbing can handle. A water pressure regulator protects your water system from leaks and burst fittings. A basic inline Camco filter is a good start, and a 2- or 3-stage filter system provides better tasting and cleaner water for drinking, cooking, and showering.
5. What’s the advantage of LiFePO4 batteries over traditional lead-acid?
LiFePO4 (lithium iron phosphate) batteries offer far more charge cycles, deliver more usable capacity, charge faster, and require almost no maintenance. They don’t vent acid mist or corrode terminals and pair extremely well with solar panels. Upfront cost is higher, but long-term performance and convenience are significantly better for most RV campers.
6. How much solar do I need for retirement travel?
For light off-grid use (keeping batteries topped off, running an alarm, fans, dehumidifier, and a 12V fridge), 200–400 watts of solar with a good controller and LiFePO4 batteries works well. Running air conditioners full-time on solar alone is usually impractical; most seniors use solar for everyday loads and a generator or shore power for heavy draws like A/C.
7. What interior upgrades make the biggest difference in comfort?
Popular comfort upgrades include: a better mattress or topper, step covers and an interior entry mat, refrigerator bars and fans, a small dehumidifier, additional USB and 12V outlets, improved task lighting, and organizing bins for cabinets and under-bed storage. These small changes can transform daily RV life, especially on longer trips.
8. How can I make entry and exit safer as I age?
Install an upgraded, larger exterior grab handle, add a lower grab rail at the bottom of the stairs, use non-slip step covers, and consider a portable step if the first step is high. Good lighting at the entry, inside and out, also reduces the risk of trips and falls, especially for nighttime bathroom trips.
9. What should I look for in a storage facility for my RV?
Look for fenced and gated access, camera surveillance, good lighting, and a history free of catalytic converter thefts (for motorhomes). Covered storage is ideal to protect from sun and weather. Ask about access hours, on-site services like propane refills or a sewer dump, and confirm that the facility meets your insurance company’s security requirements.
10. I’m a first-time RVer. Where should I camp for my first trip?
For your first camping trip, choose a full-hookup campground (water, electric, and sewer) within a short drive of home. Avoid steep mountain roads and tight urban areas until you’re comfortable with your RV. Plan a 2–3 night stay so you can test all systems, refine your packing list, and work through any problems without the pressure of a long cross-country adventure.
Discover more from RetireCoast.com
Subscribe to get the latest posts sent to your email.


